Quantcast
Channel: Continuous Lighting – ProPhotoNut
Viewing all 174 articles
Browse latest View live

Fujifilm X Creative shoot/ workshop in Manchester

$
0
0
Model Jenny Cooper in the corredors of power. Lit with a Lupo Dayled 1000 spotlight.

1. Model Jenny Cooper in the corridors of power. Lit with a Lupo Dayled 1000 spotlight.

Here is a small selection of the pictures I shot on my Fuji X100 at last weeks workshop in Manchester. Chris Hanley joined me in teaching 12 delegates our style of interior portrait shooting. We secured the fabulous Hilton Cloud 23 bar for the shoot and had full Hilton hospitality.

2. The sumptuous upholstery in the Cloud 23 bar was perfect for this simply lit shot.

2. The sumptuous upholstery in the Cloud 23 bar was perfect for this simply lit shot.

3. Sunlight and imagination create striking portraits. Nearly every delegate came away with something different here.

3. Sunlight and imagination create striking portraits. Nearly every delegate came away with something different here.

Chris and I swapped delegate groups every 45 minutes so that each photographer captured every set up. Chris and I both shot on the X100 and our delegates sported a mixture of X-Pro1 and X100 cameras. Styling and the make up was by the models. This was a fun informal day enjoyed by all.

4. It was my role to show the system of using Speedlights with the X series cameras. In this instance I used a Nikon SB900 on a Gemini bracket.

4. It was my role to show the system of using Speedlights with the X series cameras. In this instance I used a Nikon SB900 on a Gemini bracket.

5. The light in Cloud 23 was wonderful and natural light pictures were everywhere to bew seen.

5. The light in Cloud 23 was wonderful and natural light pictures were everywhere to be seen. It always seems to be sunny when I’m in Manchester.

6. I love a bit of table action. We used the Nikon Speedlight for this shot too.

6. I love a bit of table action. We used the Nikon Speedlight for this shot too.

7. Golden glow was provided by winter sun and creative use of the 'K' white balance setting.

7. The golden glow was provided by winter sun and creative use of the ‘K’ white balance setting.

8. Jen Brook has a fabulous figure to work with when pulling shapes.

8. Jen Brook has a fabulous figure to work with when pulling shapes.

9. With the X100 LCD screen it is quite straight forward seeing the composition from all angles.

9. Using the X100 LCD screen it is quite straight forward to compose shots from all angles.

10. Natural light shooting opportunities were everywhere.

10. Natural light shooting opportunities were everywhere.

11. We explored the intimacy of head shot portraits with the 35mm eqv field of view.

11. We explored the head shot portrait potential with the 35mm eqv field of view of the X100. A depth of rapport is so important with intimate portraits like this.

12. I unleased a Lupolux LED 1000 daylight balanced Fresnel spotlight and the resulting shots were tremendous.

12. I unleashed a Lupolux LED 1000 daylight balanced Fresnel spotlight and the resulting shots by the group were tremendous.

13. I love the low key opportunities a powerful spotlight can give. The more powerful the light the moodier the image. The LED spotlights by Lupolux have full dimmer control so it's easy to set the shadow density.

13. I love the low key opportunities a powerful spotlight can give. The more powerful the light the moodier the image. The LED spotlights by Lupolux have full dimmer control so it’s easy to set the shadow density in the unlit zone.

14.

14. The lower you go the better the view.

15. Shot on the X100 using just the Lupolux LED 1000 spotlight.

15. Shot on the X100 wide open at f/2 using just the Lupolux LED 1000 spotlight. I love the f/2 look from the X100 lens. The bokeh is not fussy and demanding attention like most full frame 35mm fast prime lenses I’ve tried.

16. After dark with one spotlight and the ambient light in the hotel.

16. After dark with one spotlight and the ambient light in the hotel.

17. A Lupolux 1000 spotlight some 40m away provided the light on Jen Brook.

17. A Lupolux 1000 spotlight some 40m away provided the light on Jen Brook. Decent LED spotlights have a good throw on them. The light from LED panels with an array of small LEDs falls off beyond a few meters.

I saw this and thought of a bunch of grapes. Cue the post workshop drink in the pub next door.

18. I saw this and thought of a bunch of grapes. Cue the post workshop drink in the pub next door.

If you have an X camera and would like to join Chris and I on a portrait shooting adventure, our next workshop is on 2nd May and we will be returning to the fabulous Hilton Deansgate. Full details are here.

Stay creative and stay inspired. Feel free to comment below.

Chris Hanley’s amazing pictures from this workshop are here.


Bridal Fashion Workshop with Carla Monaco ~ Pictures

$
0
0
The beautiful Carla Monaco lit with a single Lupolux Quadlight 1500 with the new grid attachment. Heavenly light.

1. The beautiful Carla Monaco lit with a single Lupolux Quadlight 1500 with the new grid attachment. Heavenly light for a classical look.

I shot all of these 33 pictures using the Fujifilm X-Pro1 with the 18-55mm zoom lens and a Tiffen Black Pro Mist 1/8th filter attached. One camera, one lens and up to two lights at any time for a simple yet stylish shoot. I had 5 delegates with me and we shot all day in the sumptuous Hilton Hotel in Manchester. We were in the Cloud 23 bar all morning and then after a delightful lunch we moved to the corridors and reception areas for the afternoon shoot.

A single light can be so effective if it has a lens and barn doors.

2. A single light can be so effective if it has a lens and barn doors. I used the Lupolux DayLED 1000 for this shot.

Dresses: Lisa Keating
Makeup and hair styling: Emma MacKenzie
Model: Carla Monaco

We lit Carla with a pair of Speedlights in a Lovegrove Gemini bracket and a silver umbrella.

3. We lit Carla with a pair of Speedlights on a Lovegrove Gemini bracket rigged with a silver umbrella.

I worked with a narrow gamut and aimed for a harmony of colour hues.

04.

4. Carla has wonderful lines to light. Same lighting set up as above.

5. We moved over to the window with the Gemini rig.

5. We moved over to the window with the Gemini rig for this full length shot.

6. I love to really explore the balance and structure of a face from different angles. I totally love this angle and the delicate curves that are scribed by Carla's ¾ profile.

6. I love to really explore the balance and structure of a face from different angles. I totally love this angle and the delicate curves that are scribed by Carla’s ¾ profile. Emma’s fabulous work with Carla’s hair and make up completes the look.

7. A splash of Gemini flash was used for this shot too.

7. A splash of Gemini flash was used for this shot too.

8. The Manchester skyline was underexposed by a couple of stops to make this dramatic shot lit with a pair of Speedlights.

8. The Manchester skyline was underexposed by a couple of stops to make this dramatic shot lit with a pair of bare faced Speedlights.

9.

9. The Gemini combo worked well for this shot.

10. We explored different framing options and I opted for the 18mm end of my Fujifilm zoom to pull in the ceiling.

10. We explored different framing options and I opted for the 18mm end of my Fujifilm zoom to pull in the ceiling.

11. The low viewpoint and the Gemini Speedlight combo makes this shot.

11. The low viewpoint and the Gemini Speedlight combo makes this shot.

Fashion shoots for a designer have to show the whole dress from the front back and ¾ views plus we have to shoot the details too. This workshop was aimed at those photographers wanting to offer their brides a fashion shoot type experience. I gave less attention to the dress than I would do on a commercial shoot and I gave Carla a bit more of a role and prominence.

12. I can't resist reflections.

12. I can’t resist reflections.

13. It's not like me to play with colours but I thought I'd blend cool shadows with warm highlights. Straight colour is always my favourite choice.

13. It’s not like me to play with colours but I thought I’d blend cool shadows with warm highlights on a couple of shots. Straight colour is always my favourite choice.

14. Lit with the Lupolux Quadlight in the same set up as picture 1.

14. Lit with the Lupolux Quadlight in the same set up as picture 1.

15. Black and white is more of a distortion as we never see in black and white but I love it.

15. Black and white is more of a distortion than cross processed colour as we never see our world in black and white, but I love it.

16. I chose a ground level viewpoint for this shot lit with the Lupolux 1000 LED spotlight.

16. I chose a ground level viewpoint for this shot lit with the Lupolux DayLED 1000 spotlight.

17. The Lupolux spotlight light delivers such a flattering light.

17. The Lupolux spotlight light delivers such a flattering light with crisp hard shadows.

18.

18. Carla is such an experienced model that she can really be left to her own devices on a shoot. I like to take control a bit too much but perhaps it’s because I’ve photographed over 400 weddings for non models who needed help posing.

19. I showed the group how to make a wedding dress shine.

19. I showed the group how to make a wedding dress shine.

20. Carla looks fabulous in this pose. Perhaps it's my favourite

20. Carla looks fabulous in this pose. The dress is divine too. I could see this shot on the cover of a 1940′s Brides magazine.

21. I never rule out the passport pose square on to deliver striking shot.

21. I never rule out the passport pose, square on and emotionless to deliver a striking shot. This is down to breath taking beauty and simple complimentary light.

22. We explored the simple reflections of our lighting in the brushed stainless doors of the lift.

22. We explored the simple reflections of our Speedlight based lighting rig in the brushed stainless doors of the lift. I spent a lot of time on my knees on this workshop.

23. A fleeting moment caught. Perfect for one of those black and white cards with speech bubble captions. What would your caption be? Best answer in the comments below gets a complimentary download of my next video production due out in Feburary (2013).

23. A fleeting moment caught. Perfect for one of those black and white cards with speech bubble captions. What would your caption be? Best answer in the comments below gets a complimentary download of my next video production due out in February (2013).

24. With the build up to my Film Noir workshops in full flow I had to show some simple lighting techniques using two Lupolux spotlights.

24. With the build up to my Film Noir workshops in full flow I had to show some simple Hollywood lighting techniques using just two Lupolux spotlights.

25. The halation is caused by light scatter on the Tiffen Black Pro Mist filter attached permenantly on my 18-55mm Fujinon zoom lens.

25. The halation is caused by light scatter on the Tiffen Black Pro Mist filter attached permanently on my 18-55mm Fujinon zoom lens.

26.

26. Again, just two lights were used for this shot that looks like it was lit with three.

27. The Manchester Hilton has a fabulous staircase that comes alive after dark.

27. The Manchester Hilton has a fabulous staircase that comes alive with light after dark.

28. The Lupolux DayLED 650 spotlight was used through dingle for this shot.

28. The Lupolux DayLED 650 spotlight was used through dingle for this shot. The warm glow is coming from uplighters in the floor.

29. A bit of clever dickery was used for this shot under the stairs.

29. A bit of clever dickery was used for this shot under the stairs. I’m not sure I like it but it shows we were looking and trying. It’s good to make mistakes. It’s better still to admit them at the time and move on quickly.

30.

30. Using a spotlight with a lens and a set of barn doors you can control where the light doesn’t fall. Sometimes this is very important to isolate the subject.

31. It was completely dark in this staiwell.

31. It was completely dark in this stairwell. The Hilton is lit with pools of light.

32.

32.

33. Sometimes a face draws me in.

33. Sometimes a face draws me in. Carla has one of those faces. I’m going to share an obsovation with you. Look how level Carla’s eyes are in this picture. Now look at shot 21. When I was a lighting director at the BBC we learned how to create symmetry in faces using light and camera angles. It pays to really look at the person you are shooting.

This was my first shoot with Carla and I am very excited about our next shoot together. Take a look at this! Carla and I would love you to join us. There are just two places left (at the time of writing) and I’ll be mood boarding the shoot this weekend.

Please feel free to comment below.

Editorial fashion shoot with the X-Pro1 ~ Pictures

$
0
0
01. Katy McGee

01. Katy McGee wears Miss Jones lingerie. lit with daylight. 18mm setting on the 18-55mm Fujifilm zoom.

This was a skills enhancement shoot with my friend and fellow pro photographer Brett Symes. Brett and I shoot together a couple of times a year and we always come away from our shoots with new ideas and a renewed passion for photography. I’ve never worked with assistant photographers but I often shoot alongside other pros like Julie my wife, Brett, Chris Hanley and Martin Hill. I get a real buzz when I’m sharing the creative process and the buzz is priceless. Here is a small selection of my shots from our shoot.

03.

03. 18mm setting on the 18-55mm Fujifilm zoom. Our sumptuous surroundings gave the shoot an edge.

Photographer and event coordinator: Damien Lovegrove
Photographer and location manager: Brett Symes
Fashion designers: Miss Jones and Lisa Keating
Make up and hair: Viki Waghorn
Models: Katy McGee and Charlotte Roest Ellis

03.

03.

All the shots were taken on the Fujifilm X-Pro1 camera at ISO 1600 with the 18-55mm zoom lens wide open. I used my Gitzo Monopod, RRS ball head and L plate to support the camera. Shutter speeds ranged from 1/30th to 1/125th second and were selected in manual exposure mode.

04.

04. Charlotte in a corset by Lisa Keating.

05.

05. Charlotte wears lingerie by Miss Jones. I used a Tiffen Black Pro Mist 1/8th filter on the lens throughout the shoot and swapped to the 1/4 strength filter for some close ups. This is pretty much what I shot in camera with the white balance set to 4000k.

06.

06.

08.

07.

08.

08.

09.

09.

10.

10. Katy wears bra, knickers and corset by Lisa Keating.

11.

11.

12.

12. Charlotte wears Lisa Keating lingerie.

13.

13.

14.

14. Charlotte and Katy wear Miss Jones creations.

15.

15.

16.

16.

Milk-Thistle-17

17.

18.

18.

19.

19. Charlotte wears Miss Jones lingerie.

20. Taken with the Tiffen Black Pro Mist 1/4 filter.

20. Taken with the Tiffen Black Pro Mist 1/4 filter. The in camera jpeg looks identical. My camera settings: Sharpness -1, Highlight -1, DR100, NR-2

21.

21.With the 1/8th Black Pro Mist filter.

22.

22.

23.

23. Charlotte wears a corset, neck corset and bra by Lisa Keating.

24.

24.

25.

25. Katy wears lingerie items by Lisa Keating.

26.

26. Charlotte wears lingerie by Miss Jones. Lit with daylight and practical lights.

27.

27. Charlotte wears lingerie by Lisa Keating. Lit with a Lowel iD light.

28.

28. I Lit Charlotte with a Lowel iD battery light.

29.

29.

Chloe Jasmine Whichello in the studio ~ Pictures

$
0
0
01. Chloe Jasmine Whichello

01. Classic looks and locks lit with crisp hard light. Priceless.

Here are a selection of my pictures from a 1 to 1 training session with my friend and fellow photographer Aneil Sharma. Aneil booked Chloe Jasmine, created the mood boards and styled the shoot. Vicki Waghorn designed the hairstyles and did the makeup and I was left to recreate the lighting looks from Aneil’s mood boards. This is what we got up to

02. One hard light was a good starting point for this beauty shoot.

02. One hard light was a good starting point for this beauty shoot.

03. I then evolved the look by reducing the lighting contrast and lifted the shadows.

03. I then evolved the look by reducing the lighting contrast to lift the shadows. Fabulous hair by Vicki.

04.

04. Fun and games created fleeting moments to be captured.

I used my Fujifilm X-Pro1 for this shoot. I don’t usually like working with the Fuji in the studio under modelling lights but the autofocus speed is way better now than it was with earlier versions of the firmware. The Fuji is now a joy to use in all lighting scenarios.

05.

05. Such magical beauty fills the frame even though there is lots of space surrounding Chloe Jasmine. I get drawn into this shot.

06. Retro styled sunglasses and the furry wrap are Aneal's finnishing touches.

06. Retro styled sunglasses and the furry wrap are Aneal’s finishing touches.

07. I shot all these frames using the 18-55mm zoom lens on my Fujifilm X-Pro1

07. A 3:1 contrast ratio is what we went for here. It was not measured with a meter but judged using the screen on the back of the camera. Control of contrast is one of the fundamentals I teach in my studio lighting training workshops and 1:1 sessions.

I shot all these frames using the 18-55mm zoom lens on my Fujifilm X-Pro1. There is also a Tiffen 1/8th Black Pro Mist filter on the lens to give a more analogue feel to the pictures. Lens design has advanced so much in the past couple of years we are swamped with detail and contrast on a new level. I like to knock it back a bit with glass filters rather than try to do it in post production.

08.

08.

09.

09.

10.

10.

11.

11. We went for a soft fluffy look here by reducing the lighting contrast to a bare minimum.

12.

12.

13.

13.

14.

14.

15.

15. This is the look I achieved in camera. Fabulously detailed yet etherial at the same time.

16. A familiar look

16. A familiar look. I switched to the 1/4 strength Tiffen Black Pro Mist filter.

17. Perhaps this is my favourite shot of the set.

17. Perhaps this is my favourite shot of the set.

18. Our last session of the day was lit with four classic Dedo lights.

18. Our last session of the day was lit with four classic Dedo lights.

19.

19.

I have the pleasure of shooting with Chloe Jasmine Whichello twice over the coming weeks on the Film Noir workshops. These are now sold out but Laura my PA is taking names for the next series of Film Noir workshops to be held later in the year. They may be abroad so be prepared to travel :)

Please feel free to comment below.

Film Noir ~ A Hollywood style reborn

$
0
0
01. Chloe-Jasmine Whichello armed and dangerous.

01. Chloe-Jasmine Whichello armed and dangerous. Film Noir calls for some dramatic acting and there is no better actress for this role than Chloe-Jasmine. Let the drama begin. I lit this scene with two Lupolux DayLED fresnel spotlights. There is no mains power in the cellar at Pipwell Hall so I used  lithium Inverters to power the lights. I used a prototype printed gel on the key light to break it into a pattern. These pattern printed gels will soon be available here and are equably suitable for hot lights and cold running spot lights.

The pictures in this post were shot on my recent ‘Film Noir’ workshop in Northampton. I’ve been researching the genre for some 4 months and I was generally unimpressed by the lack of great reference images on Google. It was upon this discovery that I knew I was onto something.

02. Frank the co star made a shadowy appearance.

02. Frank my co star made a shadowy appearance. I wanted to include a male figure in some of my pictures so I decided we should make one. Luke, my graphic designer and web guru sketched a man wearing a hat and holding a gun on A4 paper. He scanned the sketch into the computer and tidied the image in illustrator. It was then projected onto an A0 sheet of foam core attached to the wall of my studio with gaffa tape and our man was re outlined at life size. Luke cut out and trimmed Frank and I attached him to a lighting spigot using a magic arm. The whole job took a couple of hours. This scene was lit with a Lupolux 800 HMI spotlight on Chloe-Jasmine and a Lupolux 1200 HMI spotlight on Frank.

The Wikipedia entry for Film noir is “…a cinematic term used primarily to describe stylish Hollywood crime dramas, particularly those that emphasise cynical attitudes and sexual motivations.” Hollywood’s classical Film Noir period is generally regarded as extending from the early 1940s to the late 1950s however it often depicted scenes from just after the great depression of 1929 – 1933.

I’ve been shooting with a classic Hollywood style since I completed my lighting director training at the BBC way back in 1992. But is has only been since 2008 that I’ve integrated this style of photography into my lighting and portraiture workshops. The vintage style has been the trigger for this resurgence of interest. I’m not a fan of vintage with Instagram looks or altered colours, however I do predict that pure monochrome Hollywood style portraits like those crafted by Studio Harcourt in Paris will be a future product genre to line the pockets of professional studio based photographers.

03. The cellar at Pipwell made a great location to light with the classic techniques of dappled key light and well controlled backlight.

03. The cellar at Pipwell made a great location to light with the classic techniques of dappled key light and well controlled back light. It’s important for Film Noir images to have depth and the back light in this picture delivers just that. Notice how it kicks off the tips of the stair treads to define the set.

I’m often asked what makes a portrait ‘Hollywood’ in style? My answer is the light sources and lighting in general. Vintage Hollywood also needs appropriate hair, make up and fashion styling to complete the look. There is a new genre opportunity that takes classic Hollywood lighting and fuses it with modern fashion styles like the exciting emerging SteamPunk movement. What makes this Hollywood lighting special is the use of traditional spotlights with fresnel lenses and barn doors. These luminaries produce crisp hard light that is controllable using a flood/ spot system and by shaping of the barn doors. That sums up pretty much everything you can’t do with studio flash without expensive fresnel adaptors.

04. Strong use of back light is a characteristic trait of the genre.

04. Strong use of back light is a characteristic trait of the genre and here it was used to extreme.

The great news with fresnel lensed lighting is it has come of age and is now more convenient and better value than ever before. Arri, 150, 300 and 650 fresnel spotlights cost less than Nikon or Canon Speedlights and even the powerful daylight balanced units from Lupolux are a comparable price, pound for Lumen. The Lupolux spotlights use HMI or LED sources, are cool running, can work off batteries or inverters and produce enough light to use sensible shutter speeds for hand held shooting. This innovation is exciting for stills photographers because we can tap into the kind of lighting that was the reserve of film crews with mega budgets.

The numbers in the Lupolux range of lights refer to their equivalent power when compared to tungsten spotlights. All the Lupolux units emit a cool pure daylight balanced light of between 5200k and 5600k depending upon the light. The Lowel and the Arris are warm tungsten balanced lights of 2950k and 3100k respectively and are used primarily after dark when tungsten room lighting becomes the principal light source of the set.

05. I lit the piano interior with a Lowel iD light, C-J with an Arri 150 and I used an Arri 300 as a backlight.

05. I lit the piano interior with a Lowel iD light. I lit C-J with an Arri 150 and I used an Arri 300 rigged in the next room as her backlight. Careful control of contrast and the ambient light level is needed. What may look like black holes in the images are indeed zone 1 0r 2 and will print as beautiful deep shadow detail. The dress falling off Chloe’s shoulder references the ‘Sexual motivations’ of the Film Noir genre.

Shoot essentials

Model/ actress: Chloe-Jasmine Whichello
Makeup and hair: Claudia Lucia Spoto
Styling: Chloe-Jasmine Whichello, Lisa Keating and Damien Lovegrove
Location: Pipwell Hall, Northamptonshire
Camera kit: Fujifilm X-Pro1 with 18-55mm OIS f/2.8-4 zoom and 35mm f/1.4 lenses.
Filters: Tiffen Black Pro Mist ¼ on all pictures.
Lights: Arri 150 and Arri 300 junior spotlights. A Lowel iD battery light with lithium power supply. Lupolux DayLED 650 and 1000 spotlights. Lupolux HMI 800 and 1200 Spotlights.

06. Crisp hard spotlights make wonderful portrait lighting set ups.

06. Crisp hard spotlights make wonderful portrait lighting set ups. I like my pictures to be true to the moment and I therefore avoid Photoshop where possible. This philosophy goes against the current trend of erasing blemishes. I love my subjects to be real in all their quirky gorgeousness. My favourite pictures of all time by other photographers are mostly taken on film and the resulting prints show reality in a refreshing way.

A note about cameras: I rarely use DSLRs any more because the latest crop of mirrorless cameras are more convenient, lighter and have amazing image quality. I get a far higher sharpness success rate with my Fuji X-Pro1 than I do with my Canon 5D mk2 and the lenses are better too. Even the Olympus OMD with it’s smaller micro four thirds sensor is knocking on the door of the latest DSLRs. I’d have no issue for any of these pictures to be printed to 40″ x 30″ and they were all shot at ISO 1600 on the Fuji. How times change. A few years ago I owned a Hasselblad H2 with a Phase One P25 back to get a similar quality of image but with a maximum of ISO 400. I’m not old skool, I’m embracing the latest generation of technology and I suggest it’s the way to go. In fact the Fuji lenses are so sharp and the system resolution so high that I’m using Tiffen Black Pro Mist diffusion filters as standard to give me the filmic look. I love getting the look in camera using glass filters than relying on digital algorithms to attempt a similar look in Photoshop. Using glass is quick and consistent.

07. Chloe played her part with a convincing conviction. Let's hope this scene is never acted out for real.

07. Chloe-Jasmine soon got to grips with the Walther PPK and played her part with a convincing conviction. Let’s hope this scene is never acted out for real because there will only ever be one looser.

08.

08. The use of light fittings in the shot to provide a ‘lighting motivation’ is a trick of film making techniques that makes even the most dramatic lighting become believable. The carefully set barn doors on the key and back lights make the picture what it is. Owning a spotlight is not enough. Just like owning a great camera, knowing how to use it is vital. In workshops like this I unravel the intricate process of setting lights artistically rather than just illuminating the scene with spotlights. Once shown how, delegates are empowered to explore and make beautifully lit images. Nothing is quite as exciting to a photographer than being able to use light creatively.

09. Precariously positioned at the top of the ladder in high heals is our actress who embraces danger.

09. Our actress is precariously positioned at the top of the ladder in her high heels. Chloe-Jasmine is known for embracing danger. C-J is a tough gutsy girl just like the role she plays in our Film Noir workshops.

I chose to loosely base my interpretation of Film Noir on the 1930s through to the 60s but I styled each shot in isolation. I therefore had the opportunity to neglect any degree of continuity. I gathered props using Ebay and other sources. I bought a 1932 Remington typewriter, a Bakelite phone, a Zorki 5 camera in Russian guise, fake money,  and various fashion accessories including pairs of glasses. I borrowed a genuine Italian Police issue Walther PPK hand gun for the shoot too.

10. The bedroom scene

10. The bedroom scene is lit with two small Arris. I used the Lovegrove Avenger boom arm extensively in order to keep the lighting stands out of shot.  Chloe-Jasmine wears a Black tulle shrug with collar by Lisa Keating. Lisa has been very influential in my latest round of picture styling. Her fun enthusiasm fuels my learning of fashion and the intricacies of making women look fabulous. In this shot I’ve keyed Chloe-Jasmine to create shadow under her cheek bone and to emphasise the gentle curve of her jaw line. Film Noir lighting has to be inch perfect to get the look.

11. When lit with a pool of softer light the Film Noir look is gone. This has overtones of 60s Hollywood when softer key lights became more prevelent.

11. When lit with a pool of softer light the Film Noir look is all but gone. This picture has overtones of 60s film making when softer key lights became more prevalent.

12. Money is at the root of all evil. Or so they say.

12. Money is at the root of all evil. Or so they say. I lit C-J with a Lupolux Quad 1500 with it’s optional honeycomb grid attachment fitted. Where the light doesn’t fall is ultimately more important than where it does fall. The fall off of light is at the heart of Film Noir.

13. Just two lights were used to illuminate this scene in the library.

13. Just two lights were used to illuminate this classic Film Noir scene in the library.

What commercial value is there in ‘Film Noir’? I hear you ask. Well, I think every country house hotel murder mystery event should have a Film Noir event photographer with three or four pre rigged set ups. With a careful choice of props the images taken will make beautiful portraits perhaps replacing the now fading pin up genre. Continuous light is the future and photographers and videographers alike are in heaven with fresnel spotlights at the heart of their systems.

14. This shot features my Remington typewriter the PPK hand gun and the Bakerlite phone

14. This shot features my Remington typewriter, the Walther PPK hand gun and the Bakerlite phone from Ebay. The exposure was set by the roaring fire. The lighting was then set to correctly expose Chloe-Jasmine in situ. I used an Arri 150 as her key light and the 100w Lowel iD light as her back light. You can see the halation from the Black Pro Mist filter on the sequins on Chloe-Jasmine’s dress. At a 100% view the Tiffen filter exhibits a real analogue look. Black Pro Mists maintain the absolute sharpness but scatter a tiny proportion of the image light in a similar way to the base layer on film emulsions.

If you would like to learn how to shoot Hollywood style or Film Noir portraits like this then come on the next series of Lovegrove Film Noir workshops. They are fun, information rich, well run events with just six delegates. I’d like to run a two day workshop covering Hollywood ‘Glamour of the Gods’ style portraiture on day one and Film Noir on day two. If you want to take part in this email Laura right away. Just say ‘Interested in Hollywood event” Click here for more information about this Film Noir workshop.

15. High key Hollywood lighting is just as beautiful as low key and might just prove more profitable for some professionals.

15. High key Hollywood lighting is just as beautiful as low key and might just prove more profitable for some professionals.

Hollywood style lighting floats my boat. Please feel free to comment below if it floats your boat too. If you were a delegate on this workshop I’d love to hear your comments and see links to your images too.

Black Swan starring Raphaella McNamara

$
0
0
01

01.

This Black Swan workshop was day two of my Passion Photography Experience event at Pipwell Hall. After a very successful Film Noir shoot a home cooked dinner together and a night of rest it was time for my delegates to become immersed in a styled art nude workshop. I used continuous lighting from Lupolux and Arri to light Raphaella. I shot all these frames on my Fujifilm X-Pro1 with the 18-55mm zoom lens and I fitted a Tiffen 1/4 Black Pro Mist filter to calm down the digital edge of the files. NSFW after the jump.

02.

02.

Shoot Essentials:

Makeup and hair: Claudia Lucia Spoto
Styling: Raphaella McNamara, Lisa Keating and Damien Lovegrove
Location: Pipwell Hall, Northamptonshire
Camera kit: Fujifilm X-Pro1 with 18-55mm OIS f/2.8-4 zoom lens.
Filters: Tiffen Black Pro Mist ¼ on all pictures.
Lights: Arri 150 and Arri 300 junior spotlights. A Lowel iD battery light with lithium power supply. Lupolux DayLED 650 and 1000 spotlights. Lupolux HMI 800 and 1200 Spotlights.

03.

03.

04.

04.

05.

05.

06.

06.

07.

07.

08.

08.

09.

09.

10.

10.

11.

11.

12.

12.

13.

13.

14.

14.

15.

15.

16.

16.

17.

17.

18.

18.

19.

19.

20.

20.

21.

21.

22.

22.

23.

23.

This event was intended as a one off. However if you would like to join me on a Black Swan workshop in another location please email Laura. If we have enough interest I’ll add another date. Please feel free to comment below :)

A fun studio test shoot with Vicki Blatchley and a Harley Davidson

$
0
0
01.

01.

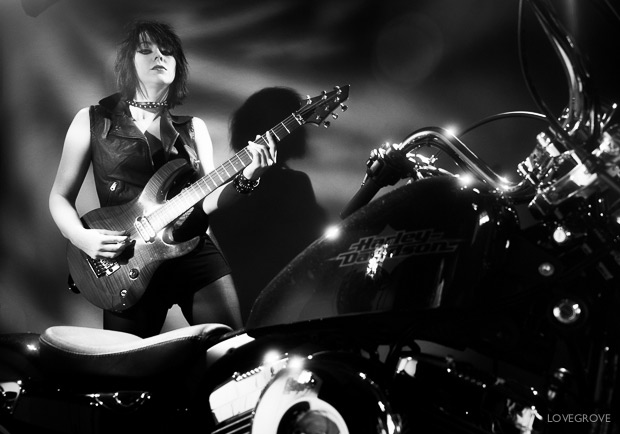
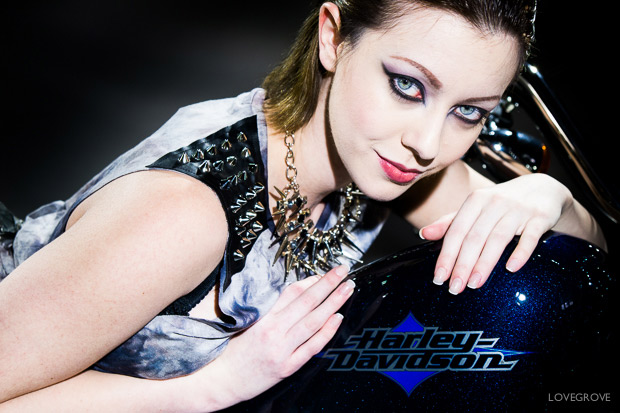
My studio is normally fine for head shots and mid length shots at a push but we filled it with a brand spanking new Harley Davidson straight out of the crate and there was not much room for anything else. Luckily I did manage to save a bit of floor space for my friend Vicki. Here are a bunch of pictures from our fab studio shoot.This is everything I never do and that was a great reason to do it. I rarely work with props in the studio and I’ve never shot a bike either. I wanted to shoot Vicky for my Fallen Angel project earlier this year and Our diaries never aligned. So we did a bike shoot instead.

The pictures here have just been whizzed through Lightroom and there is still some Photoshop work to do to make any of them print ready.

Shoot stats:

Model: Vicki BlatchleyMake up: Vicki Waghorn
Stylist: Jacqui Jones
Props: Len Martin and Waghorn Guitars

Camera: Fujifilm X-Pro1, 18mm-55mm zoom and 35mm prime lenses.
Tiffen Black Pro Mist 1/4 on all shots
Lighting: Lupolux 800, Lupolux 650 and Lupolux 1000 Fresnel Spotlights

02.

02.

03.

03.

04.

04.

05.

05.

06.

06.

07.

07.

08.

08.

09.

09.

10.

10.

11.

11.

12.

12.

13.

13.

14.

14.

15.

15. Vicki is checking out the stunning hand built Waghorn Super Strat guitar.

16.

16.

17.

17.

18.

18.

19.

19.

20.

20.

21.

21.

22.

22. My daughter Francesca wanted in on the action so she jumped on the bike while Vicki was changing. I’m a bit biased but I love this cool, no nonsense look of hers.

23.

23.

24.

24.

25.

25.

We went down to the Moorend Spout pup for lunch, Then I shot a filter test. The results of the test are here under the gallery tab half way down the page on the right. After that interlude we shot a few one light portraits to finish the session.

26.

26.

27.

27.

28.

28.

Feel free to comment below.

Wlada Schuler in the studio with the X-Pro1

$
0
0
Lit with a Lupolux 1200 HMI fresnel spotlight and a Lovegrove 'Alto' gobo gel to add the dappled effect.

01. Creativity overflowing in Munich. I lit Wlada with a Lupolux 1200 HMI fresnel spotlight with a Lovegrove ‘Alto’ gobo gel clipped to the barn doors to add the dappled effect. Wlada wears a fabulous hand made corset by Lisa Keating. I provided the tutu skirt to complete the look.

Creating fun moments and capturing them with a good sense of timing is what it’s all about. In this post I’m sharing a few sequences that I shot last week in Munich from a 1:1 studio boudoir tutorial with Radmila Kerl followed by a studio lighting workshop for six delegates. Here is a selection of the images we created.

These pictures have only been through Lightroom and have not been Photoshoped. The beauty, love, and fun you see here is real. NSFW after the jump.

02. Wlada and I have fun. We have shot once before in Berlin and the parties there were nearly all-nighters.

02. Wlada and I have fun. We have shot once before in Berlin and the parties there were nearly all-nighters. The spark and catalyst comes from a mutual respect and trust. These are the foundations that a youthful spritz can be created. Laughter and fun are ever present when I’m shooting portraits. The energy in these pictures is a fusion of my ‘messing about’ and Wlada’s reactions.

There were two other women in the room. Diana Zwarthoed our make up artist and Radmila Kerl my student and fellow photographer. It must be said that Radmila and I share a fun outlook on life and we have many laughs each time we are together. We spark off each others energy and that generates the kind of vibe needed to bring some life into our pictures.  Radmila has been a student of mine for 4 years now making many trips to the UK for 1:1 and workshop sessions. I’ve steered her business and now she is one of, if not the top social photographer in Germany. I am very proud to have seen Radmila rise above the noise of mediocrity into the upper echelons of excellence.

03. I love the way the Fuji X-Pro1 dynamics work at ISO 3200. These next two panels were all shot at ISO 3200. I'd be happy to print the images at any size.

03. I love the way the Fuji X-Pro1 tone dynamics work at ISO 3200. These next two panels were all shot at ISO 3200. I’d be happy to print the images at any size. I used a Tiffen 1/4 Black Pro Mist filter on the 60mm Fuji lens too.

04. Sequences make beautiful albums and if you charge by the print get good at shooting sequences.

04. Sequences make beautiful albums and if you charge by the print get good at shooting sequences.

I must say at this point that I rarely use the X-Pro1 in the studio when I’m using flash because the lighting level from modelling lights is not sufficient for my 60mm lens to focus. Continuous light is fine as you would imagine. I persevered and soon got the hang of working with the 18mm – 55mm zoom lens at 55mm instead. I’m waiting on the Fuji 56mm f/1.4 lens due out later this year.

05.

05. I lit this sequence with Radmila’s Prophoto studio heads. I lifted the studio light level with the Prophoto while maintaining a soft delicate lighting style. I nearly always reflect light off walls and surfaces to achieve this kind of look. Wlada wears a tutu skirt from Radmila’s studio wardrobe.

06. Lit with the Lupolux 1200 light with the 'crackle' gobo gel fitted.

06. I lit this set with the Lupolux 1200 light with the ‘crackle’ gobo gel fitted. Hard light generates higher contrast and gorgeous shadows. Knowing how to use hard light properly is the key to it’s success. Let me show you how at one of my studio lighting, Boudoir or Hollywood Glamour workshops.

07.

07. Wlada decided the ladder was a good prop to use and I liked her hat.

08. We had a fusion of ideas for this set of images.

08. We had a fusion of ideas for this set of images that I lit with a strip light softbox.

09.

09. Beautifully simple portraits of a simply beautiful girl.

After the boudoir shoot we went out in Munich for a night on the town.  I was up early the next day to prep for the Studio lighting workshop. Delegates started arriving at 8am so It was a challenge for me to function as I’m not normally a morning person.

10. This triptych was shot on my X100. It is the only set from the two days that I used the X100 for but I was up a ladder and it just seemed like the right camera for the job.

10. This triptych was shot on the studio lighting workshop using my X100. It is the only set from the two days that I used the X100 for but I was up a ladder and it just seemed like the right camera for the job. I lit Wlada with a Lupolux 1200 HMI light and the Lovegrove ‘Alto’ gobo gel. Wlada feels amazing in a corset by Lisa Keating.

11. Wake up!

11. Wake up! I used a pair of colour gels from the Lovegrove Studio collection to light Wlada from behind and a beauty dish with a grid from the front. The smoke had mostly dissipated by this point as I let the delegates shoot first while I did the wafting.

12. Low key in a high key studio proved rather difficult but we got there.

12. Low key in a high key studio proved rather difficult but we got there with controlled lighting.

13. Wlada make shooting fun.

13. Wlada make shooting fun. There’s never a dull moment as we egg each other on.

14.

14. I lit this scene with a Lupolux 1200 and a potted plant from Radmila’s studio. I put the plant on a table and adjusted it’s position until magic happened. Wlada wears a dress made for her by her dad.

15. Such fun, great memories and a super tiome in Munich.

15. I now have great memories of my fun time in Munich.

Thank you Radmila Kerl for your hospitality, friendship and patience.
Thank you Diana Zwarthoed for your calming expertise and beautiful make up.
Thank you Lydia Krumpholz for rescuing me in my hour of need.
Thank you Wlada Schuler for your spirit of adventure and positivity.
Thank you Rico Pfirstinger for your excellent X-Pro1 book.

If you would like to be kept up to date on my workshop schedule or indeed if you want me to run a specific workshop or deliver a 1:1 training session for you please just drop Laura a quick email.

Please feel free to comment on these pictures.


Lighting winter weddings in castles with the Lowel iD and Lovegrove Gemini systems

$
0
0
01.

01. Hopetoun House in all it’s splendour. I lit Siobhán with a Lowel iD light on a Lastolite Jupiter stand.

I am given various challenges as part of my day to day photography training business but none are tougher than this one. My long term clients Alan and Jackie Rankine flew me up to Edinburgh to give two days of 1:1 tuition in January. The theme was lighting winter wedding portraits and groups in castles and stately homes. I was faced with that classic combination of heavy rain on a bitter wind barely illuminated by what little daylight there was in January that far North. Here are some of the magical pictures we created at Dundas Castle and Hopetoun House

02.

02. The Lowel was used as a back light here.

03. Creativity is about seeing picture opportunities wher to the untrained eye none may exhist.

03. Creative photography is also about seeing picture opportunities where the untrained eye see obstacles.

Make up: Lucy Gourlay
Hair: Keith Marshall
Model: Siobhán Leith
Venues: Dundas Castle and Hopetoun House

04.

04. Even the entrance porch is an exciting space when it is lit with the Lowel iD light.

05. An advantage of working on dull days in the winter is that it always feels like dusk.

05. An advantage of working on dull days in the winter is that it always feels like dusk and simple lighting can make beautiful pictures.

06. Forget Speedlights here. This kind of venue deserves lighting at the next level up.

06. Forget Speedlights here. This kind of venue requires lighting at the next level up. Forget LED, HMI and flash, there really is no substitute for the industry standard battery powered Lowel iD light. That is why the top pros use it, week in and week out in the winter.

07.

07. A diagonal slash of light from the Lowel allowed me to illuminate the painting too.

08.

08. The silver frames on the sideboard contain pictures of royalty taken at various visits to Hopetoun.


09. The crisp shadows from the Lowel provide

09. The crisp light from the Lowel is perfect for close ups too.

10. No Lovegrove shoot would be complete without a bit of fun.

10. There is always time for a bit of fun.

11. Again just a single Lowel is all we used for this shot.

11. Again just a single Lowel is all we used for this shot.

12.

12. As the light faded at the end of the day we had to turn the Lowel down on the dimmer to keep a sensible balance. The Lowel can run on full power for well over 3 hours on one charge with the Lovegrove Lithium battery pack.

13. Even a paneled cupboard i

13. Even a panelled corridor is a location for a shot. A wall light provides our back light in this shot.

14. I lifted off the lamp shade of the lamp just to the right of camera. This then became my key light and the Lowel was the back light.

14. I lifted off the lamp shade of the lamp just to the right of camera. This then became my key light and the Lowel was the back light.

15.

15. Dappled light is my speciality.

16. Next it was time for a pair of Speedlights in the Gemini bracket shooting through a white umbrella.

16. Next it was time for a pair of Speedlights in the Gemini bracket shooting through a white umbrella. On half power these Speedlights can light big groups and recycle quickly but on 1/125th power they are far more subtle as this sequence shows.

17.

17.

18.

18.

19.

19.

20. We had to do it. We popped outside for five minutes to shoot with the Gemini rig. Both the Lowel and Gemini rig are cable free so they can go anywhere without mains power.

20. We had to do it. We popped outside for five minutes to shoot with the Gemini rig. Both the Lowel and Gemini rig are cable free so they can go anywhere without mains power.

21.

21.

22.

22. Lighting a picture properly is so much better than just using a fast lens or high ISO.

23. We returned to the house via the stables.

23. We returned to the house via the stables.

24.

24.

25.

25.

26.

26.

27. For formal portraits the Gemini and Speedlight rig is the best I've used. The dress is clean and bright, the side light ads warmth and character to the shot and the softness of the brolly diffuses the shadows.

27. For formal portraits the Gemini and Speedlight rig is the best I’ve used. The dress is clean and bright, the side light ads warmth and character to the shot and the softness of the brolly diffuses the shadows.

28. The sofa on the top landing at Dundas was in shadow until we lit it with the Gemini.

28. The sofa on the top landing at Dundas was in shadow until we lit it with a Speedlight in the Gemini.

29.

29.

30. The Gemini was perfect here too.

30. The Gemini was perfect here too. This is my formal portrait set up. I’d use it for a bride or the queen.

31.

31.

32.

32.

33. As the light fades it's time to bring out the Lowel.

33. As the light fades it’s time to bring out the Lowel.

34.

34.

35.

35. One of my favourite shots is this frame lit with the Lowel. Great venues and fabulous brides deserve wonderful light. Nothing less will do.

36.

36.

When Laura, my PA organises training events like this we rely on the expert services of venue coordinators and I must say that both of our chosen venues were exceptionally helpful in accommodating us. Nothing is quite as romantic as a winter wedding in a Scottish castle but it is not easy for photographers to capture the magic. That is why expert photographers like Alan and Jackie keep ahead of their competition by regularly investing in training and the right tools for the job. It’s not surprising that the Rankines are in constant demand when others around them are finding the industry tough at the moment. Dedication to excellence pays off.

If you would like me to unravel your lighting challenges please send Laura an Email. Together we can put you ahead of your competition and fill your diary with top profitable weddings.

Lisette Mibo wears corsets by Lisa Keating

$
0
0

Here are a few frames from a recent test shoot. I was trying out a new workshop venue and practising with my Lupolux DayLED 1000 light. Lisette answered my tweet asking for a test model and our shoot was arranged. There were a few factors that nearly transpired to cancel the shoot but by lunchtime we were all good to go.

Model: Lisette Mibo
Makeup: Lisette Mibo
Styling: Damien Lovegrove and Lisa Keating
Shoot assistant: Charlotte Roest-Ellis

Camera kit: Fujifilm X-Pro1, 18-55mm zoom, 35mm and 60mm primes.
Lighting kit: Lupolux DayLED 1000, Lovegrove Scattergels™, Lovegrove Pure Sine wave inverter battery pack.

01. Lit with just one Lupolux DayLED 1000 on full power.

01. Lit with just one Lupolux DayLED 1000 on full power.

02.

02.

03.

03.

04.

04.

05.

05.

06.

06.

07.

07.

08.

08.

09.

09.

10.

10.

11.

11.

12.

12.

13.

13.

14.

14.

15.

15.

16.

16.

17.

17.

18.

18.

19.

19.

Please feel free to comment :)

Kate-G Portfolio shoot

$
0
0
Kate is one of those models that truly shines through any shoot. I used just one flash head for this simple shot.

01. Kate is one of those models that truly shines through any shoot. I used just an Elinchrom Quadra flash head for this simple shot.

I shoot model portfolios from time to time and here are 12 frames from a recent studio session.

Kate loved the flare shots I took of Agata Mazur back in 2010 and I set about recreating a few similars in my studio.

02. Kate loved the flare shots I took of Agata Mazur back in 2010 and I set about recreating a few similars in my studio. I shot this with one Lupolux DayLED 100 lamp from behind. I didn’t notice Kate’s bra strap on the first few images but this got edited for the frames we sent her. These are just the Lightroomed set. I have the client pictures Photoshopped as required.

Make up and hair by Vicki Waghorn
Camera: Fujifilm X-Pro1, 18-55mm lens, Tiffen 1/4 black pro mist filter.

03.

03. When I’m shooting flare shots I use my left hand to control the quantity of light directly hitting the lens.I like to ‘connect’ in portfolio work. Fashion neutral expressions are boring by comparison.

04. I like to 'connect' in portfolio work. Fashion neutral expressions will not cut it in a portfolio.

04. It’s rare for me to shoot from above the eye line but I chose to soften Kate’s look by shooting from above.

05.

05.

06. A corset by Lisa Keating made a guest appearance and Kate loved the corseted look.

06. A corset by Lisa Keating made a guest appearance and Kate loved the corseted look.

07.

07.

08.

08. Kate is kind, eloquent, beautiful, patient and professional. If you are an agent and are interested in signing Kate please get in touch with me and I’ll pass your details onto her.

09.

09.

10.

10.

11.

11.

12.

12. Kate is one of the best, most natural and gorgeous models that I have worked with.

If you are a model and you want some personality in your portfolio please get in touch with me via Laura, my PA. We can work on a style of image to suit your potential and bring out your inner self.

Please feel free to comment.

Emily Saron test shoot in Manchester

$
0
0

In a quest to find new models and locations for my forthcoming workshops in Manchester this summer, I set up a test shoot with my friend and fellow photographer Aneil Sharma. We pulled together resources and here are a few of my pictures:

01. Emily was lit with four Dedo tungsten spot lights for this first set up of the morning.

01. Emily was lit with four Dedo tungsten spot lights for this first set up in our Manchester bar.

02. The bar we chose was full of interesting textures and a Buddah

02. The bar we chose was full of interesting textures and a Buddha.

Make up: Emily Saron
Camera: Fujifilm X-Pro1, 35mm lens and 18mm – 55mm zoom plus Fujifilm X100
Post Production: A whiz through Adobe Lightroom

03. Emily wears a corset by Lisa Keating and is lit with three Dedo lights.

03. Emily wears a corset by Lisa Keating and is lit with three Dedo lights.

04.

04. I loved the staircase in this bar and just had to shoot it.

05. This reflection zone reminds me of a shot I did way back for my Speedlight Mastery DVD.

05. This reflection zone reminds me of a shot I did way back for my Speedlight Mastery DVD.

06.

06. I added a tutu to this leather waspie by Lisa Keating.

07. Tequila was the order of the day.

07. Tequila was the order of the day. I lit Emily with a Lupolux 1200 light.

08. I love Emily's shoulders. Simple elegant shape and style.

08. I love Emily’s shoulders. Simple elegant shape and style.

I now have a collection of bars to shoot in and a new Manchester model too. I’ll be putting together some fashion based workshops in Manchester this summer. If you would like to be kept up to date with info on my workshops please contact Laura and she will ensure you get first news of new dates and events.

Please feel free to comment below.


Urban Portraits in Manchester with Carla Monaco ~ pictures

$
0
0
A single bare faced Speedlight was all we used for this set of pictures. We used it off camera here but later on you will see creative shots taken with the flash on camera.

01. A single bare faced Speedlight was all we used for this set of pictures. We used it off camera here but later on you will see creative shots taken with the flash on camera.

A Speedlight is such a powerful bit of kit when used well. I love hard light and this is what you get from it used off camera with no modifiers. Carla was such a sport on this shoot. It was cold and uncomfortable on the barrels.

02. A Speedlight is such a powerful bit of kit when used with a manual zoom setting. I love hard light and this is what you get from it used off camera with no modifiers. Carla was such a sport on this shoot. It was cold and uncomfortable on the barrels.

03.

03. On a cold overcast day in Manchester the Speedlight gave our pictures punch.

04.

04. Carla on the window sill of my favourite pub building in town.

05.

05.

06. Carla in the ginnal by Deansgate locks. I used f/1.4 on my Fujifilm 35mm lens to reduce the depth of field.

06. Carla in the ginnel by Deansgate locks. I used f/1.4 on my Fujifilm 35mm lens to reduce the depth of field.

07. Graffiti

07. Graffiti in the basement of a Deansgate bar.

08. A low angle Lovegrove classic.

08. A low angle Lovegrove classic.

09. Starsky and Hutch style graphics liven up this sunlit shot.

09. Starsky and Hutch style graphics liven up this sunlit shot.

10. I've been creating custom curves profiles in Lightroom to generate 'looks'

10. I’ve been creating custom curves profiles in Lightroom to generate ‘looks’. I’m not convinced I like them yet.

11. Carla at f/1.4 on the 35mm Fuji lens using my X-Pro1 camera.

11. I lit Carla with natural light and used f/1.4 on the 35mm Fuji lens with my X-Pro1 camera.

12. A single ~Speedlight gave a striking look to this Castlefield portrait.

12. A single ~Speedlight gave a striking look to this Castlefield portrait.

13. Low gamut harmony in thin monochromatic portrait.

13. Low gamut harmony in thin monochromatic portrait.

14. A zoomed in Speedlight on camera makes this shot work well. I used a Nikon SB900 on my Fuji X-Pro1.

14. A zoomed in Speedlight on camera makes this shot work well. I used a Nikon SB900 on my Fuji X-Pro1.

15.

15. I zoomed the Speedlight out to 50mm for this alternative shot in the same location.

16.

16. I posed Carla in a style I borrowed from Kate Moss. Her Belstaff campaign shots reminded me of a Blondie album artwork shoot and Carla in a leather jacket has overtones of both Debbie Harry and Kate.

17. One of my custom made film simulations partnered with the wonderful look from the 35mm wide open.

17. One of my custom made film simulations partnered with the wonderful look from the 35mm wide open.

18. Carla in the tunnel of love.

18. Carla in the tunnel of love under Gmex.

These shots were taken on my Urban Portraits workshop. It is my foundation workshop and an introduction into creative lighting. I limit the kit used to just a DSLR or compact system camera, a single Speedlight without modifiers and a lighting stand. All the strategies and techniques used are quite straightforward and the emphasis is on seeing the light and composition.

Go on, join me on my next Urban Portraits workshop, check out the details here.

A mini guide to location photography lighting kit

$
0
0

One of the questions I’m most often asked is what lights should I buy for shooting on location? So here is my quick guide to location lighting kit for photographers.

This picture of corsetry by Lisa Keating was shot on the edge of some woods with daylight illuminating Victoria from the left of the camera and a single Lupolux DayLED 1000 spotlight powered with the Lovegrove Li-Ion inverter pack was used both as kick light and to back light the leaves.

01. This picture of bridal corsetry by Lisa Keating was shot on the edge of some woods with daylight illuminating Victoria from the left of the camera and a single Lupolux DayLED 1000 spotlight powered with the Lovegrove Li-Ion inverter pack was used both as kick light and to back light the leaves.

There are two key factors to consider when choosing lighting equipment for shooting on location: Power requirements and the quantity of light required.

1. Is there a power supply available?

This is not a problem when shooting in hotels, houses or commercial buildings but if there is no mains supply you will either have to use a small generator like the type market traders use or you will have to work with battery operated lights or flash units. With a generator, studio flash heads or multiple continuous lighting heads can be powered just about anywhere that is dry.

Battery solutions: The Lupolux LED spotlights have a dedicated low voltage input of the broadcast industry standard 14.7v so they can run directly from camera batteries from companies like Anton Bauer or PAG. Or they can be plugged directly into Lovegrove Li-Ion inverters. The inverter delivers mains power up to a continuous load of 300w capable of powering a couple of Lupolux DayLED spotlights. A Lupolux Dayled 1000 light can run continuously on full power for 2hr 45m and the Lupolux Dayled 650 will last 4hr 45m on one charge of the Lovegrove Li-Ion inverter pack. For battery flash systems we recommend the Elinchrom Quadra and the Elinchrom Quadra Ranger.

I lit this Koshiba dress collection shot with an Elinchrom Quadra outside in the garden to simulate sunshine coming through the windows. It was raining at the time. I used a Lupolux DayLED 1000 with a half CTO gel as the key light and a Lupolux DayLED 650 as a subtle kick light.

02. I lit this Koshiba dress collection shot with an Elinchrom Quadra outside in the garden to simulate sunshine coming through the windows. It was raining at the time. I used a Lupolux DayLED 1000 with a half CTO gel as the key light and a Lupolux DayLED 650 as a subtle kick light.

2. How much ambient light is there at the shoot location?

Unless you are shooting at night it is likely that the ambient light level will be an influence on the exposure you are working at. If the location is out in open daylight then flash really is the only kind of light source that will be powerful enough to deliver worthwhile results. In full sun expect to need a 400ws flash kit like the Elinchrom Quadra used open faced at full power. Or if you want a soft light source you can use the more powerful Elinchrom Quadra Ranger in conjunction with a Rotalux softbox at full power or open faced at half power.

This picture of a corset by Lisa Keating was lit with an open faced Elinchrom Quadra head at about 3m from Victoria.

03. This picture of a bridal corset and skirt by Lisa Keating was lit with an open faced Elinchrom Quadra head at about 3m from Victoria.

In shaded places like woodlands, open farm buildings or interiors shot in daylight hours there are many more options.  Lupolux DayLED spotlights come into their own if you have the means to power them. The nominal 5600k colour balance ensures you can mix the lights with window light or other stray daylight. Big flash packs like the Ranger are likely to be too powerful even with a 6 stop range so a Speedlight in a Lastolite Ezybox is a better soft light source in darker conditions.

This picture taken at Dundas Castle in Scotland was shot on a wet January day and lit with a Lowel iD light on full power.

04. This picture taken at Dundas Castle in Scotland was shot on a wet January day and lit with a Lowel iD light on full power.

In dimly lit restaurants or wedding venues in winter, flash and daylight balanced light units are overkill. This is where small tungsten light sources are perfect like the renowned Lowel iD light. The classic Lowel iD light is a 100w tungsten light with a flood spot control and a dimmer and is now supplied with a smaller and more powerful lithium ion battery. In brighter interior places at night I recommend the Arri Fresnel lights. These are mains powered and have less robust bulbs than the Lowel but the extra power and wonderful lenses make them a better choice for use on stands.

In summary

a) For full sun outside fashion type imagery 400ws – 1200ws flash packs are the tools of choice.
b) In open shade I suggest using 400ws flash packs and Speedlights.
c) For deep shade or interiors I use Lupolux Spotlights and Speedlights.
d) For lighting interiors at night I use tungsten lights ranging from 100w – 300w by Lowel, or Arri.

If you are like me and shoot in all these environments, your lighting kit list will be extensive. Some of the bigger items you can hire as and when you need them but you are more likely to use the lighting kit if you own it. My advice for any aspiring and professional photographers is get out there, light your pictures well and lift your work above the noise of the masses.

Please feel free to comment below.

Flash or Continuous lighting – Which is the best option?

$
0
0
01. Lit with the Elinchrom Quadra at midday in June. The sun popped in and I replaced it with a

01. I lit Charlotte Roest Ellis with the Elinchrom Quadra at midday in June. The sun popped in and I replaced it with a splash of flash from the small bare faced Elinchrom head. I find hard light the most wonderfully rewarding to use. There really is no practical continuous light capable of this output without a team of sparks a gaffa and a genny to accompany it. Fujifilm X-Pro1 ISO 200, 14mm prime lens at f/16 for 1/125th second. Ideally I should have used a  2 stop (x4) ND filter to get the lens to f/8 where it is at it’s optical peak of resolution. This shot is still super sharp and will make wonderful prints. The 14mm Fuji lens is astonishingly good. Location: Berwick Lodge Hotel, Make up: Vicki Waghorn, Styling: Lisa Keating, Model: Charlotte Roest Ellis

Today’s cameras have more sensitivity and can utilise higher ISO values than ever before. Combine that fact with the advent of very high power LEDs and you have a perfect opportunity for continuous light to regain it’s long held mantle as the tool of choice for many shooting scenarios. Is it right for you? Before the 1970′s, nearly all photographs were lit with continuous light.  Occasionally magnesium powder, flash cubes or flash bulbs were used but rarely in soft boxes or modifiers.  In the 1970s xenon flash became widely available, and because of its relative power, it allowed photographers to use big wonderful soft boxes and lighting modifiers.  One main drawback with flash is that it has to travel some distance through a tube to generate light.  Flash tubes (larger than those in a Speedlight) are normally circular but still represent quite a large light emitting area. This doesn’t matter inside a soft box, but it makes it very difficult and expensive to produce crisp hard light sources that are flash powered.  A hard light is by nature a point source of light generating sharp shadows, however very compact flash units like the Elinchrom Quadra head can generate a look similar to sunlight when used bare faced at about 3m from the subject.

02.

02. Charlotte Roest Ellis shot in my studio and lit with four Lupolux DayLED spotlights. I used a Lupolux 1000 on the background set at 40% output with a Lovegrove Scatter Gel attached. Two Lupolux 650 lights as 3/4 backlights and a Lupolux 1000 as a keylight. Fujifilm X-Pro1 ISO 400, 1/125th second at f/2.8, 35mm f/1.4 lens. Styling: Damien Lovegrove, Make up: Vicki Waghorn.

There are more and more instances where continuous light is replacing flash in the every day work of professional photographers. The first dance at a wedding for instance, where LED panels or videographer’s lights like the wonderful Lowel iD light are replacing speedlights.   The rise of video capabilities in stills cameras has created another demand for continuous light by those photographers using both stills and video in their day to day work.

Continuous light basic info:

  • Typically ISO 400 or 800 is used
  • Suits fast prime lenses with apertures from f/1.8 or better
  • Typical shutter speeds are up to 1/125th second at f/4
  • Can use any shutter speed without sync restriction. 1/500th at f/2 is quite common setting
  • What you see is what you get making lighting set up very easy
  • Can be used with any camera including camera phones
  • Easier to focus than by using modelling lights of flash units

Flash light basic info:

  • Typically ISO 100 or 200 is used
  • Suits any lenses as working apertures are typically f/5.6 – f/22
  • Shutter speed is limited by the fastest flash sync speed, typically 1.200th – 1/250th second
  • Works perfectly in soft boxes of any size
  • Can compete with the sun
  • You can’t see what you have created until after the exposure
  • Flash output is continuously variable with typically 6 stops of adjustment

Location lighting exposure guide:

  • For full sun outside fashion type imagery 400ws – 1200ws flash packs are the tools of choice
  • In open shade I suggest using 400ws flash packs and Speedlights
  • For deep shade or interiors I use Lupolux Spotlights and Speedlights
  • For lighting interiors at night I use tungsten lights ranging from 100w – 300w by Lowel, or Arri


Italy 2013 Rimini recce part 1 and the Lovegrove Nudes workshop

$
0
0
01. Wonderful locations, beautiful people, sunshine, fine food and wine. Italy has it all.We found a wonderful abandoned house to be our wet weather option.

01. Wonderful locations, beautiful people, sunshine, fine food and of course wine: Italy has it all. We found a beautifully simple abandoned house just 15 minutes drive out of town.  This will be one of our wet weather shoot location options if we get unlucky or lucky perhaps in October.

My latest Italian adventure involved a recce, a shoot and a workshop in Rimini. The district of Rimini is still well known as a beach resort with its heyday back in the 60′s but behind the façade of parasols and bars lies a classic old town set on the edge of a dramatic landscape. The newly renovated harbour is bang up to date with fabulous restaurants and yachts to enjoy over a glass of Prosecco at sundown. NSFW after the break

02. My eye was drawn to this line of olive trees as a wonmderful backdrop for some field pictures.

02. My eye was drawn to this line of olive trees as a wonderful backdrop for some figure in the landscape pictures.

03.

03.

One major goal for this trip was to complete the planning process for the second part of the forthcoming Italy 2013 workshop with my mate Chris Hanley. I had the arduous task of checking out hotels, restaurants and bars that had been selected by Terri, my host and fixer and seeking out the most unexpected shoot locations. There is no reason to shoot the obvious so we ventured out of town.

04.

04. I used the shutters to provide full lighting control in this amazing gem of a location.

05.

05. This is the wonderful colour straight out of camera with the X-Pro1. I used the 14mm lens wide open at f/2.8 with a Tiffen 1/8th Black Pro Mist filter attached. You can see the halation from the filter on the right hand shutter door. I love getting the looks I need in camera. When I used to shoot transparency for photo libraries there was no other way.

04.

06. This was shot using the new 55-200mm zoom at 82mm f/3.8. I used a 1/4 Black Pro Mist filter for that somewhat misty look.

The range of looks available in camera is wonderful. I tweak the usual sliders in Lightroom but I’m always on the look out for crushed black levels. I don’t mind bleached highlights because we are used to not resolving detail in white/ grey skies but our eyes always open up to resolve details in the shadows in a scene when we look at them.

Terri Romolo and I spent two days scouting the countryside for perfect shooting locations and we struck gold. We found abandoned houses in the rural countryside, medieval hill top towns and vistas to die for. Prior to my trip we spent time on Skype and shared location ideas using Google Earth. Terri ran a casting for models and shared her shortlist via email.

After Thursday and Friday’s scouting sessions I was itching to shoot on the Saturday and we chose the wonderful model, Alessandra to work with. I needed to practice ahead of my first Lovegrove Nudes workshop and on the Sunday I had six Italian photographers for a ‘Nudes and Glamour’ workshop too.

I shot with the Fujifilm X-Pro1, together with the 14mm f/2.8 and 35mm f/1.4 primes. I also used the 18mm – 55mm and 55mm – 200mm zoom lenses. It was the first time I’d shot for real with the new long zoom and I wanted to put it through its paces. Handling a long zoom while shooting into the sun using an electronic viewfinder is not easy. I’ll explain my technique later. For now I’ll share a few pictures of my first shoot sessions with Miss D.

08.

08. Shot with the 18mm – 55mm zoom lens with a 1/8th Black Pro Mist filter

09.

09. I used a Lee Seven 5 system 0.6 soft grad ND filter on the right hand side of this image to even out the wood panelling on this shutter.

10. I used the classic Lovegrove 2 point lighting set up for this nude portrait.

10. I again used the classic Lovegrove 2 point lighting set up for this nude portrait.

11. Fabulous beauty in a torn environment.

11. Fabulous beauty in a torn environment.

12. I love being sucked in by smouldering beauty. 170mm at f/4.7 using the new Zoom lens.

12. I love being sucked in by smouldering beauty. 170mm at f/4.7 using the new Zoom lens.

13. Miss D has a wonderful rich character that these pictures fail to depict. So I popped this shot into the set to show her true character.

13. Alessandra has a wonderful rich character that these pictures fail to depict. So I popped this shot into the set to show her true character. When we go back to Rimini in October we will be shooting with the vibrant and beautiful Alessandra again. I for one can’t wait. Are you going to join me? Details.

18. My beloved Russian Zorky 5 camera was a fun prop for a few street pictures still to come in part two but it made an apearance here as well.

18. My beloved Russian Zorky 5 camera was a fun prop for a few street pictures still to come in part two but it made an appearance here as well.

19.

19. Doors like these are inviting.

The repeat of this trip to Rimini in the region of Emilia-Romagna  will form part two of the Italy 2013 workshop that I am running with my buddy Chris Hanley scheduled for October. This 2 day addition to the Venice trip is designed to provide a more complete and better value shooting experience.

Italy 2013 will start in Venice where we will be shooting two days of street fashion and portraits in the back streets and fabulous canals well off the tourist routes. We will then have this optional part 2 trip to Rimini. The day after our shoots in Venice we will have a leisurely morning and travel to Rimini by train. In Rimini we will have a further two days of creative shooting Lovegrove nudes and classic figure in the landscape pictures with Chris Hanley in the hills that surround the classic town.

21. I bought this hat at the Saturday market in Rimini. I knew just what to do with it when I came across this rusty steel door.

21. I bought this hat for €12 at the Saturday market in Rimini. I knew just what to do with it when I came across this rusty steel door. The colour shot is amazing but you will have to wait to see that one.

22. Here is a little sequence of pictures taken beneith the fabulous town of San Leo. I will share some shots of San Leo in my part two post.

22. Here is a little sequence of pictures taken beneath the fabulous town of San Leo. I will share some shots of San Leo in my part two post.

23.

23.

Holding the X-Pro1 camera fitted with the new 55-200mm zoom lens is not a problem in normal light. I have bought a +2.5 dioptre set of reading glasses so that I can hold the camera close to me while using the LCD screen but in strong sunlight the screen is near impossible to see. So I use a hood loupe but holding it in place is tricky. Hoodloupe have developed an attachment system for SLRs but this is a shade too big for CSCs. I can use the EVF (electronic view finder) but I have to shield my eye with my left hand. This is no problem with a small lens but it is tricky with the big zoom. The pictures from the big zoom are spectacularly sharp. Despite not having a constant maximum aperture the bokeh opportunities are plentiful and I’d say it’s not bad but not a patch on the 60mm for oof beauty. Us Fuji users are all secretly awaiting the 56mm f/1.2 promised for early next year.

24.

24.

25. It was out with the reflector for the last few pictures of the day. I used a 0.6 hard grad on the sky for this shot.

25. It was out with the reflector for the last few pictures of the day. I used a Lee Seven 5 system 0.6 hard ND grad on the sky for this shot.

26. What ever did the Romans do for us? Haha, this broken viaduct is not Roman it's definately 20th century and suffering from concrete cancer.

26. What ever did the Romans do for us? Haha, this broken viaduct is not Roman it’s definitely 20th century and suffering from concrete cancer, it looks great though.

I love this punchy close up. Miss D wears Nivia Cocoa Butter for that classic sheen look.

27. I love this punchy close up. Alessandra wears Nivea Cocoa Butter for that classic sheen look.

28. We went down to the river for one last shot of the day.

28. We went down to the river for one last shot of the day.

Another of my shoot locations if the weather is bad is the hotel I stay in so we did a quick hotel room shoot lit entirely by one Lupolux LED 1000 spotlight. I used the latest model of this amazing light and the numerous changes that have been made to the casing and operation are great improvements to an already excellent light. Lupolux are like car manufacturers tweaking their designs and releasing updates to improve their products.

29. This is my bathroom. There is a Venetian blind in the window cavity.

29. This is my bathroom. There is a Venetian blind in the window cavity. The Lupolux 1000 has a ‘crackle’ Scattergel attached.

30. I used the same scattergel on all these shots. It really maximises the look that can be achieved with just one light.

30. I used the same Scattergel on all these shots. It really maximises the look that can be achieved with just one light.

31. The bed from the bathroom. I love curves.

31. The bed from the bathroom.

34.

34.

Terri Romolo has an emerging business of arranging workshops and events for Italian photographers. She needed to establish how a workshop given in spoken English can be received by largely non English speaking delegates. We used a mixture of translation and a clear precise narrative to make this happen. I must say that we all connected and friendships were formed. Our model for these shoots chose to remain anonymous. She is not a full time professional, but she is beautiful, kind, patient and has a very professional manner about her. Our time shooting together was a great success with sessions punctuated with stops for espresso, beer and Piadinas.

The Italian way of life is wonderful.

Part 2 to follow. Please feel free to comment on these pictures or  ask questions about our Italy workshops in October.

Please take the time to like us here on Facebook. On our FB page (accessed via a ‘like’) there is a yellow sun tab that is the gateway to a special offers and voucher code page :)

Italy recce part 2 The locations and a street shoot

$
0
0
01 Michaela in one of our abandoned house venues.

01. Michaela in one of our exciting abandoned house venues. The hair light was from hazy sun coming through a small hole in the roof of the kitchen.

The trip to Italy wasn’t just about finding and shooting in ruins. I wanted to explore the Italy of today too. Like in a lot of mainland Europe, the past is living in the architecture and culture of it’s inhabitants. Here are a few of my street portraits and location shots…

02. This is a snapshot of Rimini

02. This is a snapshot of Rimini a thriving market town right on the sea.

03. San Leo is a classic fortified hill top town offering sleepy back streets to shoot in and a wonderful restaurant where we can enjoy the local Piadinas

03. San Leo is a classic fortified hill top town offering sleepy back streets for portrait shoots and a wonderful restaurant where we can enjoy the local Piadinas.

05. San Leo offers rustic and classic design backgrounds.

04. San Leo offers rustic as well as classically designed spaces.

06. San Leo

05. San Leo has a laid back culture punctuated with festivals. I am reliably informed that the young mayor of San Leo will welcome us with open arms and grant us the freedom of the town to shoot street fashion. Planning ahead and seeking permissions always pays off.

07.

06. San Leo.

8. A typical abandoned farmhouse shoot location.

07. A typical abandoned farmhouse shoot location we found enroute.

Those are a few of the shoot location options I recced for my October workshop. On the Monday I did a test shoot with Michaela our second model and I suggested we play tourists to get the shoot underway. These pictures are unstyled tests…

10.

08. Michaels soaking up the sun in one of the many hill top towns near Rimini.

10.

09. Lit with a Lastolite reflector

11.

10. With far less of the reflector.

12.

11.

13.

12.

14.

13.

15.

14.

17.

15.

17.

17.

After playing tourists we went to another old farmhouse for some rustic shooting…

15.

18.

19.

19.

20.

20.

21.

21.

22.

22.

23.

23.

24.

24.

25.

25.

26.

26.

27.

27.

28.

28.

29.

29.

30.

30. After the shoot at the old abandoned farmhouse we went up a nearby hill to see the thunder storm over Rimini and we were nearly blown off the top with the powerful gusts.

Our recommended Hotel for the Rimini part of our October workshop is the sumptuous, lavishly detailed DuoMo. A boutique hotel in every sense of the word. An amazing room rate has been secured for our trip more akin to YHA rates :) Contact Laura for the complete picture, rates and dates.

100. DuoMo Hotel in the heart of Rimini

100. DuoMo Hotel in the heart of Rimini

Please take a look at part 1 of this adventure together with my ‘Lovegrove Nude’ pictures. Here are the details for the workshop in October.

Please feel free to discuss the pictures or locations below.

10 Portraits and a review of the Fujifilm XF 55-200mm f/3.5-4.8 LM OIS lens

$
0
0
The new Fujifilm long zoom lens for the X system has muscles.

01. The new Fujifilm long zoom lens for the X system has muscles. It is sharp, lightweight, has good contrast and is well built. This shot of Jamie Roche taken during filming of my next video download production was lit with a California Sunbounce Pro silver and a Lastolite Panelite Silver/ gold reflector.

I was a little apprehensive when I ordered the new Fuji 55-200mm zoom lens. It’s not a lens that was high on my list. I mainly shoot portraits and a bit of fashion so I was interested to see how it performs in the real world. Here are ten portraits all shot with the new zoom together with my thoughts on the pros and cons of such a lens.

02. I lit Jamie with a California Sunbounce reflector

02. I lit Jamie with a California Sunbounce reflector, this time used as a keylight. The video production that this is a still from is about creating Hollywood style portraits and is mainly focussed on using hard light with interior locations.

The LCD screen on the back of the camera is never easy to use in full sun so I usually use the electronic viewfinder instead. I hold the camera in my right hand, I have the Really Right Stuff bracket to make that process easier, and I use my left hand to shield the viewfinder and my eye. This is fine with the 18mm, 35mm, 60mm primes and the 18-55mm zoom but not at all easy with the 55-200mm lens. When I’m using the long zoom I have to support the lens with my left hand.

I thought I could use a rubber eye cup to shield the sun like I did back in the early 80′s with my Pentax Spotmatic F. However there is the problem of the eye sensor being triggered by the eye cup and that in turn makes image review on the LCD a button pressing pain. An eye cup is therefore not the solution I’m after.

03. I shot these next few frames of A in Italy a couple of weeks ago.

03. I shot these next few frames of Alessandra in Italy a couple of weeks ago. I used the 55-200 wide open at whatever that aperture happened to be at the selected focal length. I used a silver reflector and some Cocoa butter to give Alessandra’s skin a sheen. The focus fall off is quite delightful. I’m not a fan of the 85mm f/1.2 or tilt shift lens look as it so unnatural.

I next tried a Hoodman loupe, wedging it between my eye and the LCD screen but because I have the collapsible variety of Hoodman it had a tendency to slip. Hoodman do happen to make quite intricate brackets for SLRs for use when filming but they are too big to use on the Fuji X-Pro1. So I decided to come up with my own solution. I remember when the Canon 5Dmk2 entered the market place with full HD Video recording capability. Some people said why? While others got on and tried to make it all work. It wasn’t long before there were big framework rigs with external monitors, audio mixers and the like. In garden sheds all over the land problems were being solved. Ball bearings were being removed from lens aperture rings to make iris action step-less and LCD hoods were developed to make the LCD usable in all lighting conditions. Some set ups looked bigger and more clumsy than a real video camera but the shallow depth of field was the gold in the mine for cinematographers.

Compact system cameras pose many of the same handling issues that DSLR video users came up against. Put a long telephoto lens on a CSC camera and you don’t want to be holding it at arms length to see the LCD screen. The optical finder is useless too so you can either use the electronic viewfinder or a Hoodman style loupe attached to the LCD. Here is the one I fashioned in 10 minutes in my garden shed. I’m delighted to say it works a treat.

4. The Hoodman Loupe attached to my X-Pro1

04. The Hoodman Loupe attached to my X-Pro1 using a handmade bracket into the RRS L plate.

05.

05. My engineering is not quite up to the standard of Fujifilm or RRS but it works and I love using this rig in full sun.

06. I have a slider slot so that the hood can attach in a second.

06. I have a slider slot so that the hood can attach in a second.

07. I have the 3.2" Hoodman that collapses to make the unit easier to fit in my Think Tank bag.

07. I have the 3.2″ Hoodman that collapses to make the unit easier to fit in my Think Tank bag.

08. A great handling camera and lens with a sumptuous viewfinder and SLR grade handling.

08. A great handling camera and lens with a sumptuous viewfinder and SLR grade handling.

The advantages of using the Hoodman on the LCD over the eye directly into the electronic viewfinder are immense. Looking through the large 20mm diameter Shott glass eye piece at a high resolution LCD is like looking through a medium format camera viewfinder. The image is big and bright. There is no sun shading to do with the left eye and the long zoom lens becomes a joy to use. If only I had my bracket gadget at last weeks sunny shoots I’d have used the long zoom more without trepidation.

04. In darker environments the image stabilisation comes into it's own.

09. In darker environments the image stabilisation comes into it’s own. The IS on the 55-200mm lens is immense. I can get steady shots of static subjects at 1/30th of a second at the 200mm setting. So using 1/60th for my static portraits is fine.

Using manual exposure with a variable maximum aperture lens is a bit of a pain. I’m forever compromising the lens to f/5.6 to avoid tweaking exposure with a change of zoom. f/5.6 is the first setting that stays constant with the full zoom range. That process alone forces me to use aperture priority. I set the lens to 55mm, turn the aperture ring to f/3.5 and I’m ready to go. I just use exposure compensation as required and the camera does the compensation for variable aperture.

Is all this modification and change worth it? The quick answer is yes. The shots from this new lens are superb. I’m delighted to be able to use a greater camera to subject distance for some of my closer portrait work.

10. Close head shots are a doddle with this new zoom lens. Even in low light.

10. Close head shots are a doddle with this new zoom lens. Even in low light.

11. Compressing perspective was the missing link in the Fuji X system.

11. The ability to compress perspective was the missing link in the Fuji X system now filled with this 300mm equivalent lens.

12. Bokey is well controlled too. It doesn't scream out drawing attention like some fast aperture lenses

12. Bokeh on the 55-200mm lens is well controlled too. It doesn’t scream out drawing attention away from the subject like some fast aperture lenses.

13. With my new Hoodman rig shots like this will be far easier for me to shoot in the future.

13. With my new Hoodman rig shots like this will be far easier for me to shoot in the future.

In the back streets of Italian hiltop towns are many wonderful backgrounds for portraits.

14. There are many wonderful backgrounds for portraits in the back streets of Italian hill top towns. I shot all the frames in this feature wide open to give an idea of the bokeh available if that is your bag.

15. I shot this at the 200mm zoom setting with me lying on the floor.

15. I shot this frame of Michaela at the 200mm zoom setting with me lying on the floor.

Do I love this lens? Yes It’s perfect in all but the darkest environments for portraits. With my 60mm f/2.4 lens I need to use 1/250th second to get a sharp shot. Gone are the days where we can use the reciprocal of the focal length to capture sharp shots hand held. With the circles of confusion getting ever smaller with reducing pixel sizes and the crop factor to consider image stabilisation is more important than ever before. I use a shutter speed of 2 (1/1.5F) for non stabilised lenses. This new zoom is just one stop down at the 60mm setting but will allow me to use 1/125th second setting to freeze subject movement so the low light capability for static portraits is about the same as the 60mm lens.

Pros:

  • Good value
  • Excellent build quality
  • Lighter than expected
  • Superb image stabilisation
  • Excellent image quality. (Better than my Canon 70-200 L IS lens)
  • Fast, silent AF

Cons:

  • Delicate mechanism (precision made but delicate, handle with care)
  • Needs an adapted viewfinder rig to use into the light in full sun
  • Best when used with a camera grip

Feel free to comment on my findings or add your findings to this post using the comments section below.

Lovegrove Nudes with Camilla Rose ~ pictures (nsfw)

$
0
0
01. Here are a few pictures from a recent workshop at Pipewell Hall.

01. Camilla Rose at Pipewell Hall. Camilla wears an under bust corset by Lisa Keating.

Here are 22 pictures from the Lovegrove Nudes workshop I recently held at the fabulous Pipewell Hall. All the pictures were shot on a Fujifilm X-Pro1 with the 18mm-55mm, 35mm or 14mm lenses plus a couple of frames were shot on my trusty and beloved Fujifilm X100. We worked with natural light or one Lupolux spotlight with Scattergels. I kept the number of delegates to 6 and everyone had the opportunity to capture all these images and many many more. NSFW after the break

Hair and make up: Claudia Lucia

02.

02. I took the first two pictures the evening before the workshop. I’d not shot with Camilla before and I wanted to clear my nerves before the workshop itself. Thank you Camilla for your patience, and professionalism. Corset by Lisa Keating.

03.

03. We started the workshop at the grand entrance to the Hall.

04. In the big dining room I closed most of the shutters to create this dark low key atmosphere.

04. In the big dining room I closed most of the shutters to create this dark low key atmosphere.

05.

05.

06. Classical window light portraits are the easiest to take and always generate results.

06. Classical window light portraits are the easiest to take and always generate results. I concentrated on revealing the shape of Camilla’s cheekbones and I let the light glance across her body to create shadows.

07. Part of the process of creating my nude portrait series is to capture personality and depth.

07. Part of the process of creating my nude portrait series is to capture personality and depth. I like to get beyond the bumps and curves and generate a real partnership. Developing any intimacy in a group situation with nudity involved requires trust and understanding.

08. The Lupolux LED 1000 was put to good use here. One 'Crunch' Scattergel provided the dapple.

08. The Lupolux LED 1000 was put to good use here. One ‘Crunch’ Scattergel provided the dapple.

09. I love Camilla's profile and I started to explore it from various angles.

09. I love Camilla’s profile and I started to explore it from various angles.

10.

10. I like aligning arms and legs to get follow through in diagonals.

11.

11.

12. Camilla's jawline, chin curve and nose profile are wonderful.

12. Camilla’s jaw line, chin curve and nose profile are wonderful. The sheen on her skin and the crisp hard light from the Lupolux are a perfect combination.

13. Most set ups are shot with or without nudity. Most delegates prefer covered up or implied nudity. Ocasionally I will shoot lingerie or partially clothed where the setting demands it.

13. The set ups on a Lovegrove Nudes workshop are usually shot with or without nudity. Most delegates prefer covered up or implied nudity. Occasionally I will shoot lingerie or partially clothed too where the setting is right for it.

14. I'm in a wonderful place with this kind of connection.

14. I’m in a wonderful place with this kind of connection. Notice the shadows from Camilla’s eyelashes. You only get this clarity with classic hard light.

15.

15.

16.

16.

17.

17. Corset by Lisa Keating The high vantage point is gained by holding the X100 above my head and using the LCD screen to frame the picture.

18.

18. Corset by Lisa Keating.

19.

19. Classical light in a classical environment. Corset by Lisa Keating.

20. The weather was kind to us so we had time for a few frames before the cold set into Camilla's bones.

20. The weather was kind to us so we had time for a few frames outside before the cold set into Camilla’s bones.

21. Classic Lovegrove lighting done natures way.

21. Classic Lovegrove lighting done natures way.

22. One of my favourite shots of 2013. This will print up beautifully.

22. One of my favourite shots of 2013. This will print up beautifully.

I have arranged one more Lovegrove Nudes workshop in the UK. Details are here. The workshop features the wonderful Carla Monaco and is to be held at the dramatic and sumptuous Maunsel House in Somerset on August 12th. Aimed at the keen amateur and aspiring professional photographers alike. At the time of writing there are just four places left. Treat yourself and make it happen. Email Laura or Damien with any questions you may have.

Lovegrove Nudes featuring Carla Monaco ~ NSFW

$
0
0
Corset by Lisa Keating

01. Corset by Lisa Keating, hair and make up by Vicki Waghorn

This was a one off workshop featuring Carla Monaco in the randomly eccentric Maunsel House. It was a combination I just had to bring together. Carla is fabulous, the staff at Maunsel less so unfortunately but a great day was had by all. Stand by your beds, here are the pictures as selected by Laura my PA plus a couple of my favourites added in for good measure.

Camera: Fuji X-Pro1 with 14mm, 35mm and 60mm lenses plus a Fuji X100 for that fabulous 35mm field of view.

Processed in Adobe Lightroom without any presets, just classic burning and dodging as demonstrated in this video.

02. Lady of the manor

02. Lady of the manor

03.

03.

04.

04.

05.

05. Crisp hard light from the Lupolux 1000 and Scattergel is fabulous

06.

06. Classic Hollywood cheek triangle

07.

07. Striking rapport grabs attention

08.

08.

09.

09.

10.

10. A simple process in Lightroom created the natural light marvel.

11.

11.

12.

12.

13.

13. 12 was Laura’s choice but I love this one as well so I popped it in.

14.

14. I removed my Tiffen 1/4 black Pro Mist for this shot with my 14mm lens. The Tiffen halation was too much for this into the light shot.

15.

15. Lupolux 1000 with a Scattergel – crisp, classic, fabulous!

16. My debut outing for my "Optical enhancement Device" prototype

16. The début outing for my “Optical enhancement Device” prototype gave this bokeh effect. More testing to come.

17.

17. Stunning beauty. 60mm at f/2.4 Lit with a Sunbounce Pro reflector.

18. The Art Gallery

18. The Art Gallery

19.

19.

20.

20. A classic Lovegrove shot often created with a bride but perfected with a nude

21.

21.

22.

22.

23.

23.

24.

24.

25.

25.

26.

26.

27.

27.

28.

28. A lot has happened on this oak table over the past 300 years

There you have a small selection of the 75 shots I made on this workshop. My delegates eclipsed these on many occasions. It was a day of creative harmony and I was delighted to be able to make it happen. That’s it for Lovegrove Nudes. Mission accomplished. I’m working on a two day lighting masterclass called “The Light” It will feature ½ a day of Speedlight, ½ a day of Quadra, ½ a day of Natural light with reflectors and ½ a day of continuous light. Everything you need to know about seeing, controlling and creating light in a single two day workshop with a communal dinner. Email Laura for more details.

Please choose your favourite shot or ask questions :)

Viewing all 174 articles
Browse latest View live